
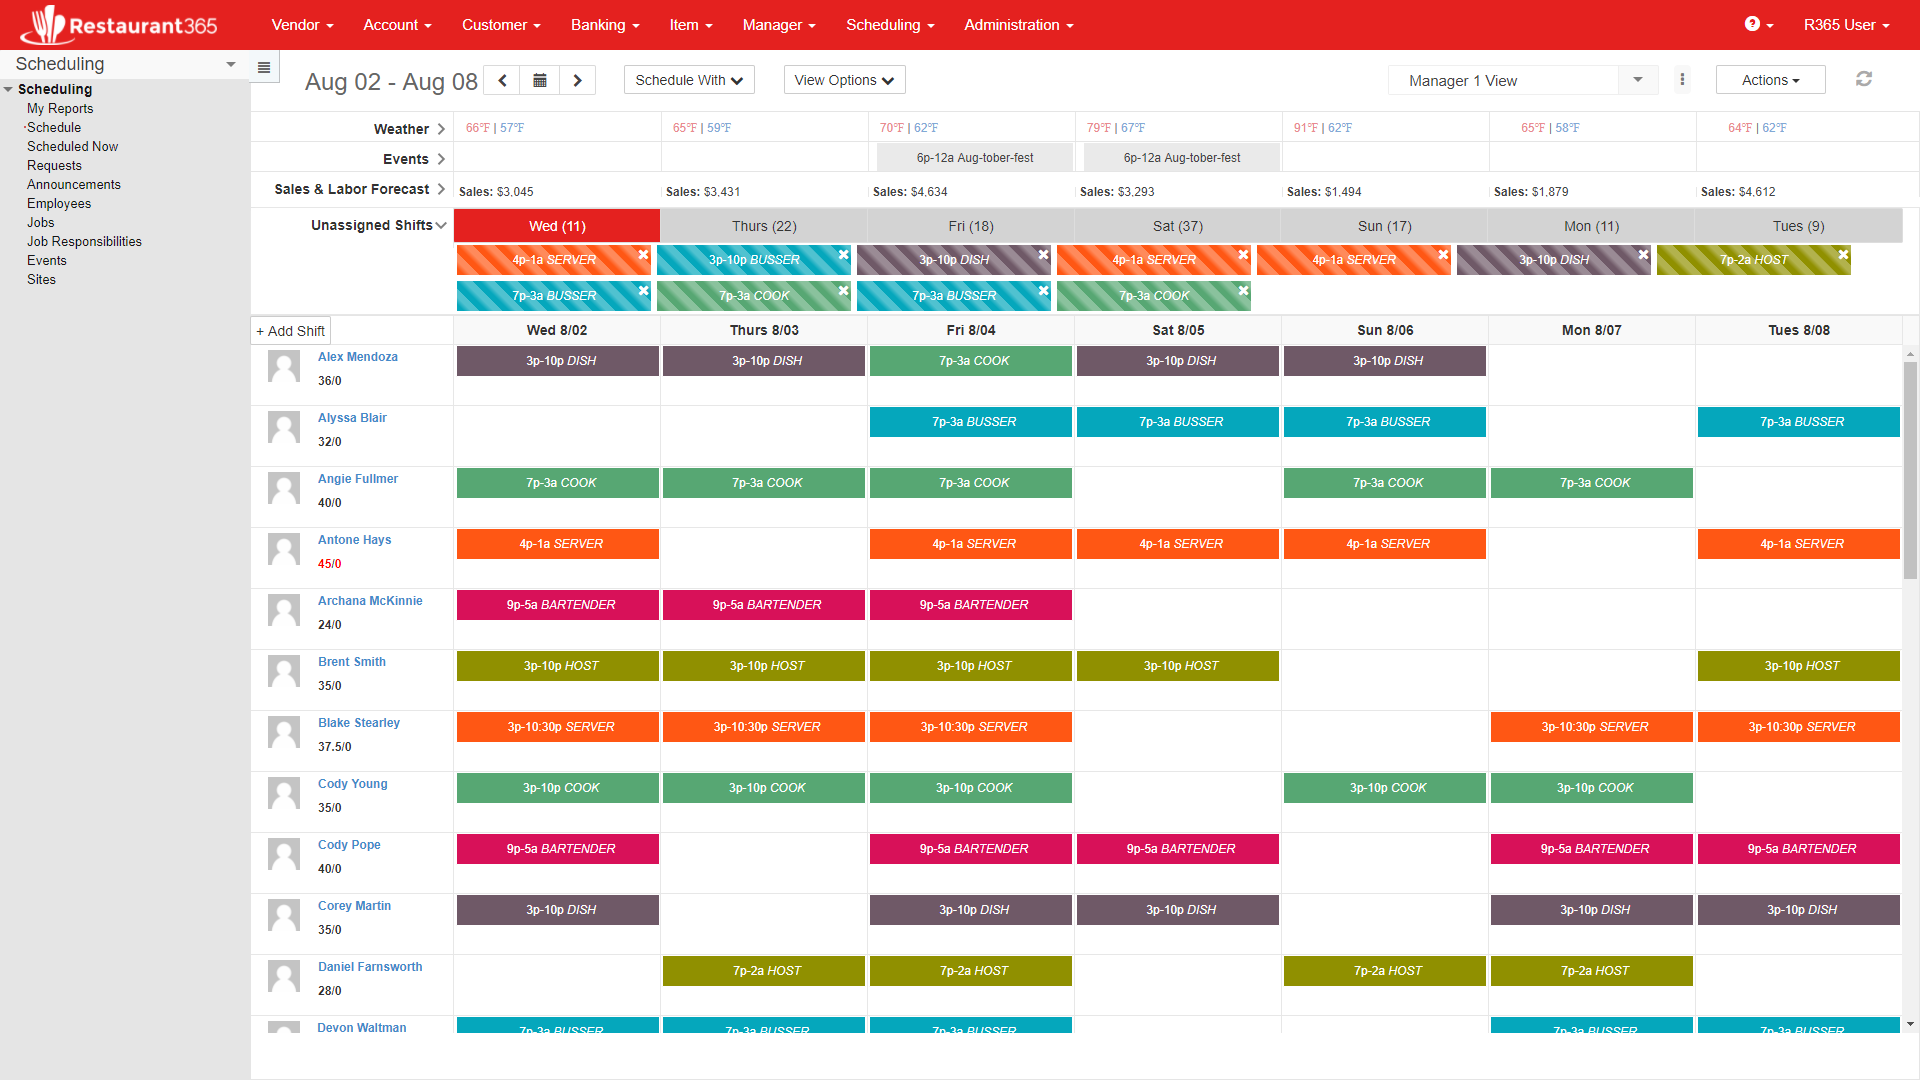
The Schedule screen in the Scheduling Module is a Calendar with Weekly or Daily views of the Schedule. From this screen Employee Shifts can be managed in a simple drag and drop form. To access this form navigate to the Scheduling Module, then select ‘Schedule’ in the left hand navigation pane. The Schedule Calendar will be shown in the center portion of the screen. The elements of this window are described below.
Header Fields
There are several selectors and buttons located in the Header that allow the User to select which Schedule to view and how the Schedule will be displayed.

1) Selected Week (or Day) – The currently week (or Day if Day is selected in ‘View Options’) is displayed in this label located in the Header
2) Week (or Day) Picker – Click this Date Picker to select a new Week (or Day). Click the ‘<‘ arrow to go back a Week (or Day). Click ‘>’ to go forward a Week (or Day)
3) Schedule With – Create Schedules from saved templates or Prior Weeks completed Schedules. This menu will be detailed below
4) View Options – Set the Calendar View options, including the Schedule Location, Job Titles, Week vs. Day and Unburdened vs. Burdened Labor estimates. This menu will be detailed below
5) Select Preferred View – Select a Preferred Schedule view based on the settings found in ‘View Options’. Preferred Views will be detailed below
6) Preferred View Options – Save, Update, Set Defaults or Delete Preferred Views
7) Actions – Bulk Publish, Unpublish, Print, Alert Employees, or Delete the Schedule
8) Refresh – Refresh the Schedule View
To load a Schedule, select a ‘Preferred View’ in the Preferred View Selector. If a Preferred View has not been created yet, expand the ‘View Options’ and set the View Parameters for your Schedule
View Options

The User’s Default Location will be set in the Location selector, all available Job Titles will be included, ‘Week’, ‘Employee’ and ‘Unburdened’ will all be selected, and ‘Weather’, ‘Events’ and ‘Forecast’ will all be enabled. These are the default View Option settings. Update each option as needed.
- Job Titles – Select the Job Titles that will be included in the Schedule. Click here for more information on Job Titles
- Week vs. Day toggle – View the Schedule by Week, or by Day
- Employee vs. Job toggle – View Employees in the Rows, or View Job Titles in the Rows
- Unburdened vs. Burdened Labor:
- Unburdened – Labor Estimates are a straight calculation of Hours * Pay Rate for all Employees. No Management Estimates or Benefits included
- Burdened – Labor Estimates are calculated using (Employee Hours * Pay Rate) + Employee Benefit percentages (per the Location Record). Management Estimates (including Management Benefits) are included
- Weather – disable and hide the Weather section
- Events – disable and hide the Events section
- Forecast – disable and hide the Forecast section (includes Labor estimates)
Once all View Options are set, save the View as a Preferred View
Preferred View
Hover over the vertical ellipses to open the Preferred View Options and select ‘Save As New’ to save the Preferred View
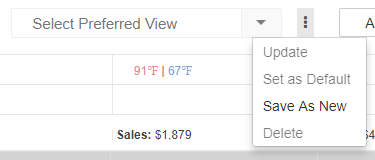
Once the Preferred View has been saved, Hover over the Options once again and select ‘Set as Default’ to save the Preferred View as the Default View. If updates are made to the View Options, click ‘Update’ to save the updates to the View. Click ‘Delete’ to delete the view from the Preferred Views list
Schedule With

The Schedule With menu allows the User to create a new Schedule from two sources:
- Prior Schedule
- Saved Template
Prior:
Click the ‘Prior’ toggle to display the ‘Select Prior Schedule’ selector. Locate the Prior Schedule then click ‘Use’ to update the Current Schedule
![]()
Template:
Select the Template in the ‘Template’ selector. If no templates exist, complete the Schedule that will be saved as a Template, then click the ‘+’ button to create a new template of the current Schedule
![]()
Once a Template exists and has been selected, the ‘Use’, ‘Edit’, ‘Duplicate’ and ‘Delete’ icons can be used
![]()
Actions
The ‘Actions’ menu allows the User to perform bulk Actions on the contents of a ‘Preferred View’. This means that Actions will only be performed for the Job Titles / Employees that were selected on the ‘View Options’ settings. Therefore, Schedules can be created and Published for only specific Job Titles / Employees and not the entire Location.
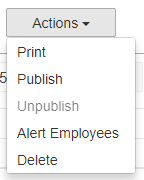
Once at least one Shift has been assigned to an Employee, the ‘Publish’, ‘Alert Employees’, and ‘Delete’ options are made available. Each Action selection except ‘Print’ has a confirmation prompt that will appear once the Action is clicked
Publish

Select the Employees who’s Shifts will be Published (will default to all Shifts), then click ‘Publish & Alert’ to Publish and Alert the selected Employees per their Preferred Contact Method located on the Employee Record. Click ‘Publish Only’ to publish without alerting.
Unpublish

Once a Schedule has been Published, the ‘Publish’ Action is grayed out, while the ‘Unpublished’ Action is made available
Alert Employees
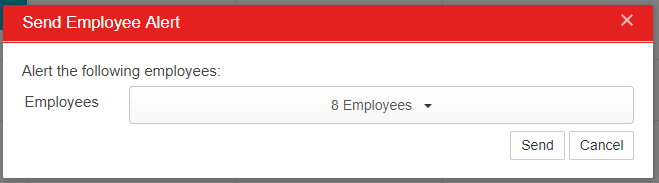
Select the Employees who will be Alerted to the current Schedule per their Preferred Contact Method located on the Employee Record. Click ‘Send’ to send the Alerts
Delete
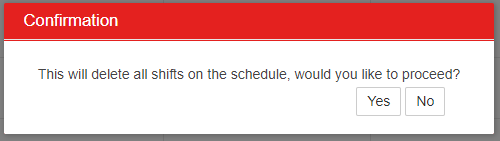
Delete all Shifts (Unassigned and Assigned) from the Schedule. This will clear all entered data for the visible date range. This will not affect the ‘View Options’ or ‘Preferred View’
Weather / Events / Sales Forecast & Labor Totals
The section below the header fields and above the calendar provides helpful info as a reference to assist when scheduling. Each section can be viewed collapsed (1 row) or expanded to show more detail. Do this by clicking the little arrow button to the right of the section title (Weather, Events, or Sales & Labor Forecast) and when expanded the arrow button will point down instead of to the right. Both images are shown below
Collapsed view

Expanded view

- Weather – displays the weather forecast at this location. Weather forecast is only available 10 days in advance. Once the day passes the weather also does not show any longer. The collapsed view shows high and low temperatures for the day, and the expanded view adds an image and text description of the weather condition
- Events – displays local events entered into the system for this location such as sporting events, performances, rallies, or other things that might affect the schedule for the restaurant. An example in the image above is where it says “7:30p-12a Lakers Game”. The collapsed view shows 1 event for each day and the expanded view will show if there are multiple events on the same day. Click here for more information on Events
- Sales & Labor Forecast – displays the sales forecast and labor totals for each day. The collapsed view shows sales forecast only. This forecast is taken from the sales forecast entered in the forecast window (click here for more information on Sales Forecasting) or if no sales forecast has been entered for this day for this location then it shows the average sales for that day of the week for the past 8 weeks. Since the Scheduler role isn’t allowed to see pay rates, this section isn’t expandable to see labor dollars for users with that role. When expanded it also shows 3 other labor fields described below
- Labor: value is calculated based on the settings located in ‘View Options’
- Unburdened – Labor Estimates are a straight calculation of Hours * Pay Rate for all Employees. No Management Estimates or Benefits included
- Burdened – Labor Estimates are calculated using (Employee Hours * Pay Rate) + Employee Benefit percentages (per the Labor Estimates on the Location Record). Management Estimates (including Management Benefits) are included
- Labor % = Labor total / Sales forecast
- Labor % vs Goal = Labor % Goal – Labor %. Labor % Goal is found on the Location form on the Goals tab where a goal can be entered for labor as a percent of sales for each day of the week
- Labor: value is calculated based on the settings located in ‘View Options’
Schedule Calendar
This is the main section of the Schedule window where Shifts are placed on the Calendar.
Shifts
Shift can be added directly to the Calendar by double clicking on a Calendar cell, or by right clicking and selecting ‘New’. Additionally the ‘+ Add Shift button’ can be clicked. Each of these actions will open the Shift form. Depending on the ‘View Options’, and how the Shift form was opened, various fields may auto-populate with the Employee Name, Job Title, or Date. Click here for more information on the Shift Form
Unassigned Shifts Section
The Unassigned Shifts, or Shifts that have not yet been assigned to an Employee, will appear in the Unassigned Shifts section. The ‘Unassigned Shifts’ section is expanded by default, but can be collapsed as needed. Shifts exist in a ‘Day Pot’ on their respective Calendar Day. In the image above, ‘Wed (11)’ is highlighted in Red because the Day Pot for Wednesday of the current week is selected, and there are ’11’ Unassigned Shifts that need to be Assigned. Unassigned Shifts can be created by right clicking in the ‘Unassigned Shifts’ section and selecting ‘New’, or by creating a Shift and leaving the ‘Employee’ field blank.
Job Title Filter
A User can perform a single Left-click on any of the Unassigned Shifts to instantly create a filter that will only display Employees that have the Job Title of the Unassigned Shift. The filtered Shift will become solid in color and the ‘Filter’ icon will appear. Click the ‘x’ on the Filter icon to clear the filter
Assigning Unassigned Shifts
Unassigned shifts can also be assigned using two different methods:
- Drag the shift from the Unassigned Shift Section on to the Employee that will receive the Shift. If the Employee is ineligible for this Shift due to Job Title or Responsibility limitations, a warning will appear and the Shift will remain Unassigned
- Open the Shift (double click or right click and choose Edit) and selecting the Employee in the Employee selector
Publishing Individual Shifts
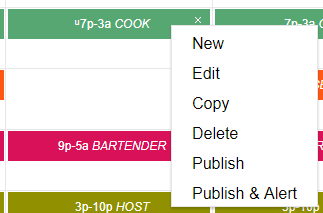
Any Unpublished Shift will have a small ‘u’ appended to the Shift in the Calendar view. This ‘u’ stands for ‘Unpublished’. The ‘u’ is removed once the Shift has been Published.
![]()
Individual Shifts can be Published or Unpublished on the Schedule Calendar
Publish Single Shift
Right click on an Unpublished Shift and select ‘Publish’ or ‘Publish & Alert’ to Publish the Single Shift.
Unpublish Single Shift
Single Shifts that have already been Published can be Unpublished using the same process as above. Right click on the Published Shift and selected ‘Unpublish’
Add or Move Shifts
- To copy a Shift, right click and select ‘Copy’ and then right click in the destination cell for the new shift and choose ‘Paste’. This will create a copy of that Shift but will change the Date to the destination Date
- To move a Shift to a different Date or different Employee, click the Shift with the left mouse button and hold down the button while dragging it to the desired slot and then release the button. If moved to a different day then the Date of the Shift will be changed automatically. If moved to a different Employee Row then the Employee on the Shift will be modified. Note: if the Shift is moved to an employee who isn’t qualified for that Job, a warning will appear and the Shift will not move
- To quickly remove a shift, right click and choose ‘Delete’
- To quickly open a Shift, double click it. Alternatively, right click and choose ‘Edit’
- To quickly create a new Shift, double click the cell where the Shift will be created (on the Row of the desired Employee and in the column of the desired day) and it will open with those values pre-populated for you. Alternatively, right click the cell and choose ‘New’
- When in the Day view, to quickly adjust the Time on a Shift, left click with the mouse on the left edge (for start time) or right edge (for end time) and drag the shift wider or narrower to change the time. You can also open the shift and adjust the times on the shift form manually
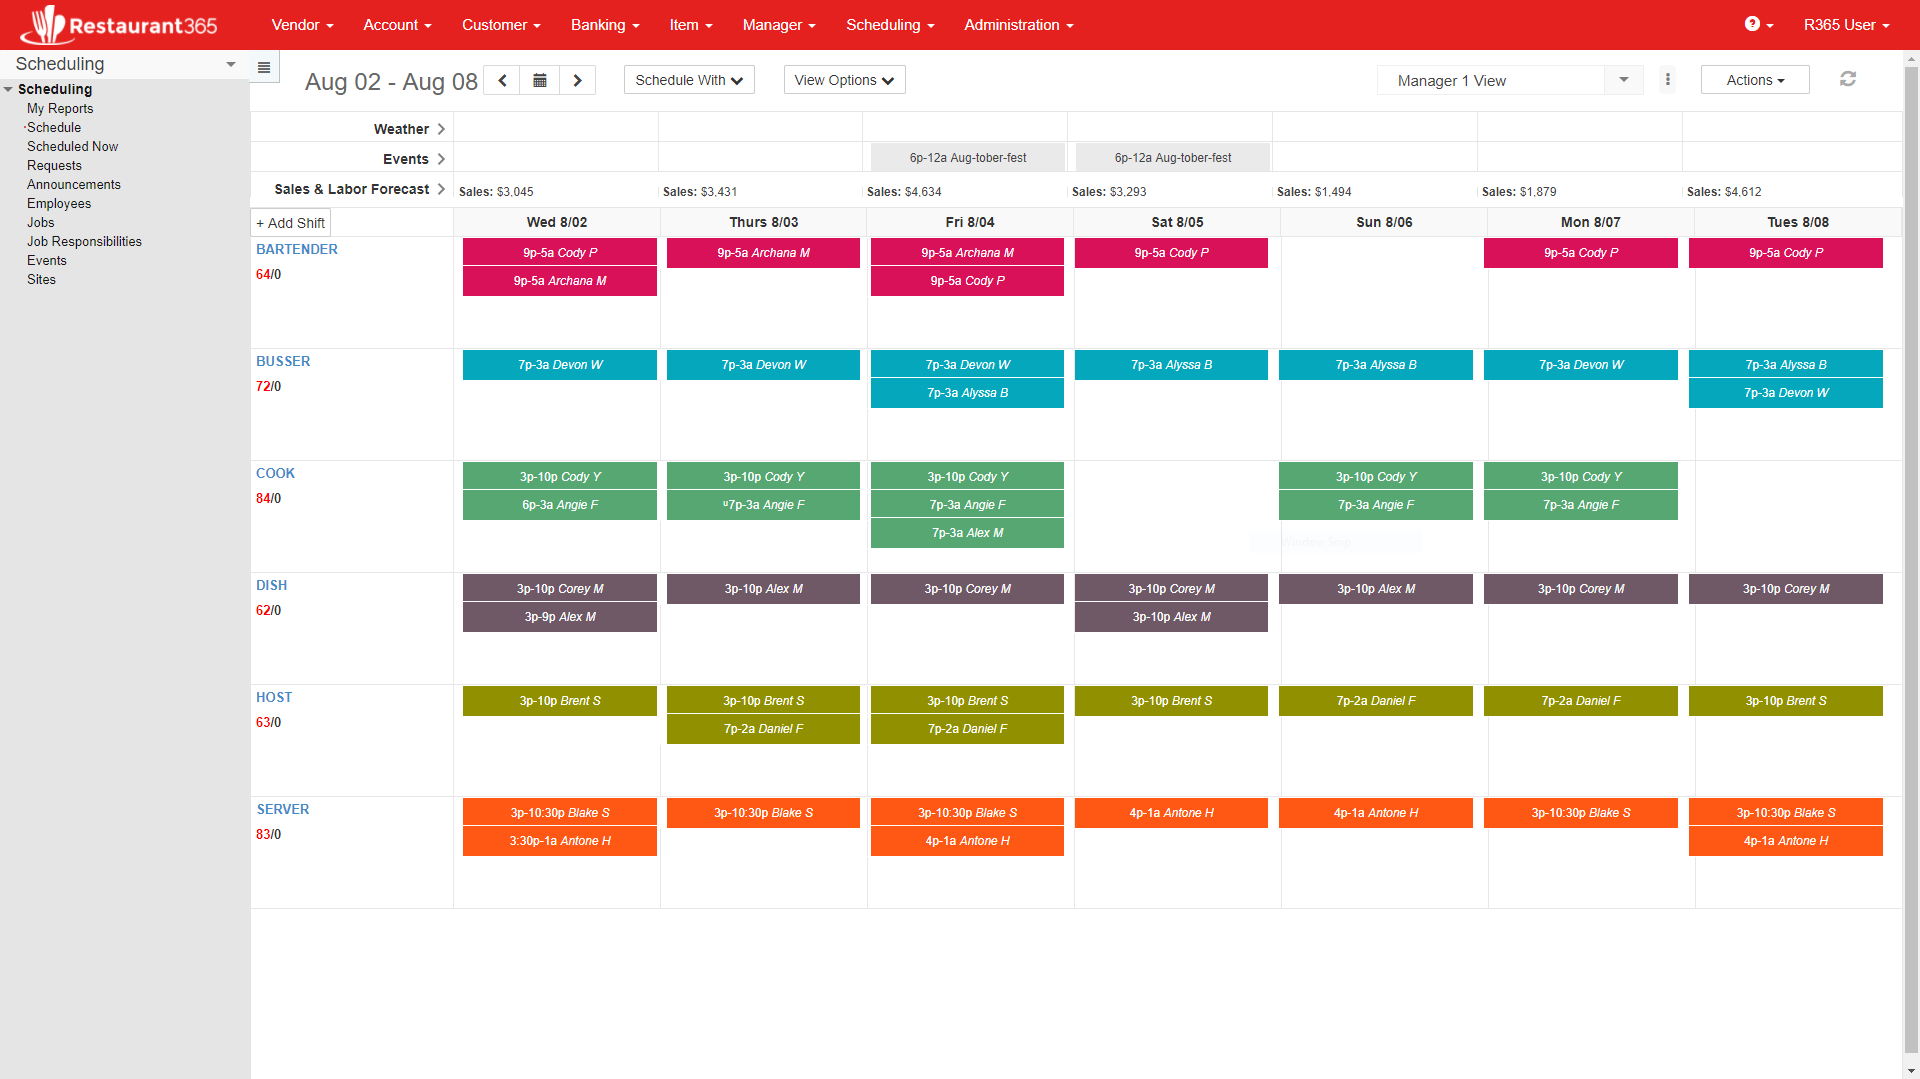
View Options: Employee vs. Job
This section behaves differently depending on if the ‘View Option’ is set to ‘Job’ or ‘Employee’. The colors of the Shifts are based on the colors assigned on the Job form.
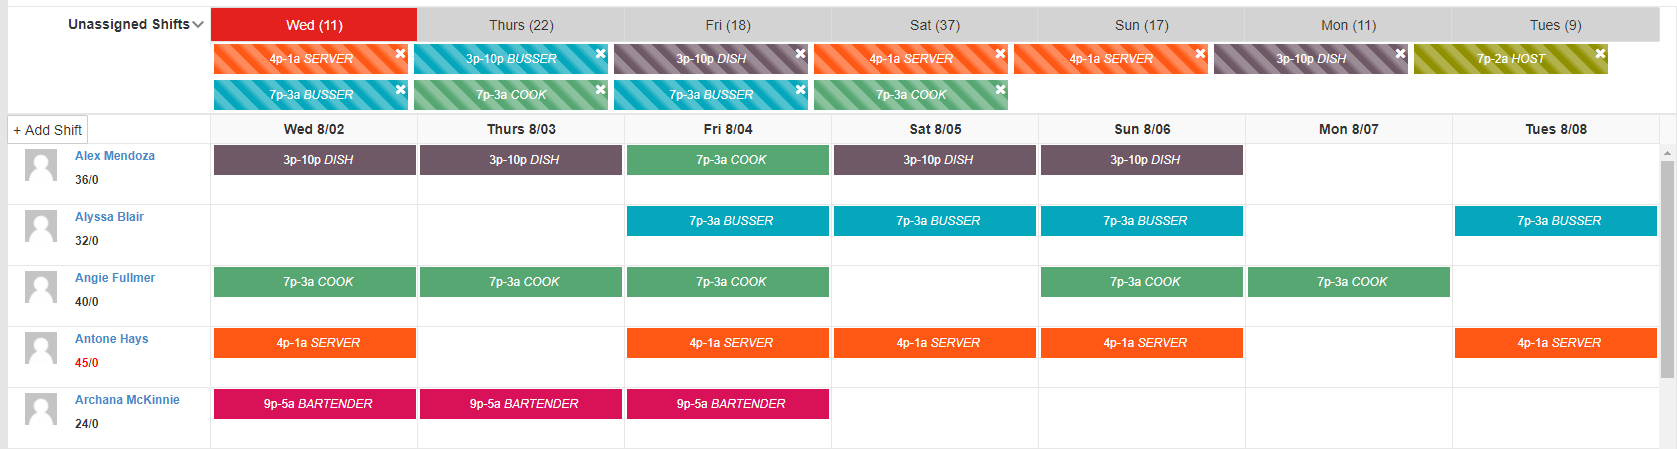
View Option: Employee
![]()
- Click here to see a Sample Image where the View Option is set to ‘Employee’
- Each row will display an employee
- The employee picture will be shown on the far left if one has been uploaded to the Employee record
- The Employee Name is shown as a clickable link to open the Employee record
- Below the employee name are two numbers:
- The first is total hours scheduled
- The second is actual hours worked for this employee. If the Employee is scheduled for overtime, these numbers will turn red as seen in the image above for Antone Hays.
- If a new Shift record is opened (either by double clicking an empty day on that Employee Row, or right clicking the empty day and choosing ‘Add’) the Employee for that Row will default on the Shift along with the Date selected
- Employee Availability:
- Hovering over any day in the Schedule will popup a message displaying that employee’s availability on that day.

- If the employee has been marked as Unavailable All Day, then a gray “Unavailable All Day” box will show for that employee on that day.
- Employee availability is managed on the Employee record. Click here for Employee training and refer to the section titled “Availability tab”
- Shifts will display the Start and End Time and the Job Title (see the Shift on Wed 8/02 for “3p-10p DISH” in the image above)
View Option: Job
![]()
- Click here to see a Sample Image where the View Option is set to ‘Job’
- Each Row will display a Job Title with all Shifts assigned to that Job showing on that Row
- Job Title is shown as a clickable link to open the Job record
- Below the Job are two numbers:
- The first is total hours scheduled
- The second is actual hours worked
- If a new Shift record is opened (either by double clicking an empty day on that Job Row, or right clicking the empty day and choosing ‘Add’) the Job for that Row will default on the Shift along with the Date selected
- Shifts will display the Start and End Time and the Employee name (i.e. 3p-10p Alex M.)
As of 10/31/2017, Scheduling V2 was released, and this article replaced the original Scheduling Calendar (which was published on 3/10/2016). Click here to download the original article in PDF form.

